Whether you’re mending a rip, adding personality to an old denim jacket, or attaching one of my Wild Minder patches to your favourite Scrappy Bag – the running stitch is a simple, satisfying way to get it done.
I recently posted a little how-to video to my Instagram showing how I sew my patches on by hand. It’s one of those things that’s almost meditative once you get into the rhythm and a lovely way to slow down and reconnect with the craft of making.
If you’re more of a visual learner, here’s a quick video of me showing you how to sew on a patch using running stitch.
Prefer a slower breakdown? Scroll on for the full step-by-step below.
 Firstly, what is a Running Stitch?
The running stitch is probably the first stitch many of us ever learned. It’s a straight, up-and-down motion – kind of like a dashed line. Super beginner-friendly, but still strong enough for attaching patches, mending rips, or creating decorative effects.
It works perfectly for my Wild Minder patches, especially if you love a visible, handmade finish.
 What You’ll Need:
• A patch
• A needle and thread (I use strong organic cotton, like Scanfill thread)
• Scissors (Preferably fabric variety)
• Pins
• The item you’re stitching the patch onto (denim works beautifully)
• Thimble (optional for thick/stiff fabrics)
 Step-by-Step:
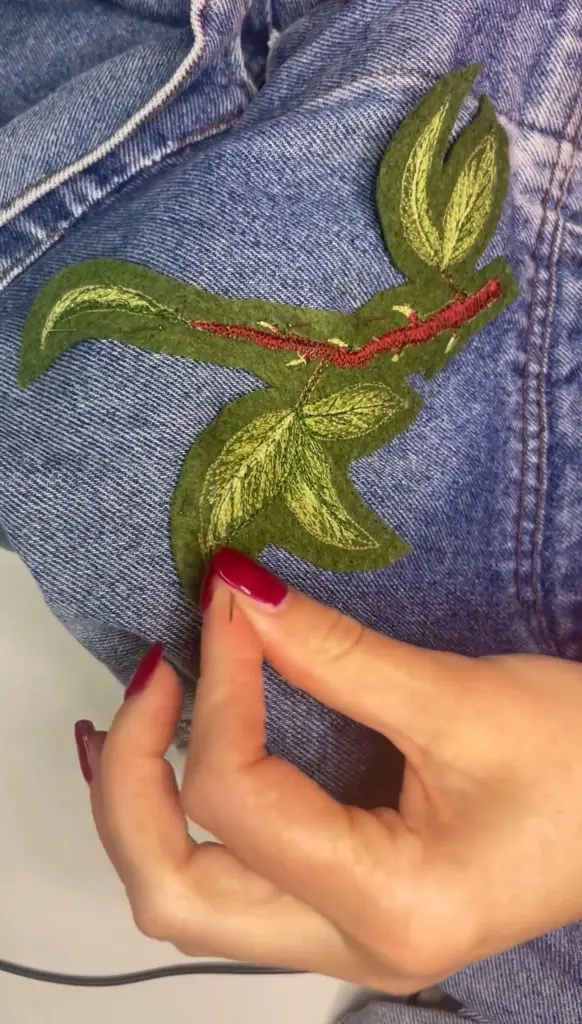
Place your patch exactly where you want it. Take a moment to adjust it – this is the commitment phase. Think about how you’ll wear the item and whether the patch will hinder or get in the way. Once you’re happy pin the patch in place so it doesn’t move.
Wild Minder tip: I’d recommend trying the item on once you’ve pinned the patch in place to check you’re doubly happy.
Cut a piece of thread about 30-40 cm long. Knot the end.
Wild Minder tip: To sew on large patches you may require several lengths of thread, but don’t be tempted to use a piece that’s too long initially, as it’s very easy to get it all tangled and knotted up when sewing.
Come up from underneath the fabric so your knot is hidden behind the patch.
Push your needle down through the top of the patch and fabric, then back up again a few millimetres ahead. Keep repeating in a line around the edge of the patch.
Wild Minder tip: Your stitches don’t need to be perfectly even — I think a bit of wobble adds charm.
When you get back to where you started, or you’ve run out of thread length, end your last stitch inside the denim jacket and use the needle to tie a small knot on the inside of the fabric to finish.
Wild Minder tip: I’d recommend going over your last stitch a couple of times for extra strength, before your finishing knot.
 More Wild Minder Top Tips:
• If your patch is stiff or thick, take breaks! Your fingers (and the needle) will thank you.
• Also If your patch is stiff or thick, and you’re needing extra force to get the needle through, you can use a thimble to protect your thumb/forefinger.
• Don’t stress over perfection. Visible stitching is part of the handmade aesthetic – and part of what makes it yours.
• If you’re sewing on stretch fabric, try stabilising it with a little interfacing first or stitch carefully to avoid puckering.
 Why I Love Hand-Sewing Patches
There’s something beautifully intentional about attaching a patch by hand. It’s slower, yes. But it’s also more mindful. It gives the piece a story.
For Wild Minder, that’s what it’s all about — honouring nature, embracing imperfection, and creating things that matter.
Check out my handmade patches or upcycled denim pieces in the shop, each one ready to be stitched into your story. 
One Response